


We may receive a commission when you use our affiliate links. However, this does not impact our recommendations.
 This fence is designed to be used at a drill press or router table, and features built-in dust collection for keeping your shop, and lungs, clean.
Project #2505 • Skill Level: Beginner • Time: 2 Days • Cost: $20
If you ask me what my favorite tool in my shop is, I would have never guessed that I would have said it is my dust collector. But, after installing a powerful 5 HP Smart Gorilla from Oneida and spending time hard piping the entire system (you may recall reading about that a few issues back), I have to say: it’s a pleasure working in the shop with quality dust collection. Most tools have pretty decent dust collection built in. Some, however, need a bit of of help in that department. This universal dust collection fence is designed to be used at the drill press and router tables to help gather some of that lose dust.


Cutlist and Diagrams


 Plywood Parts
This little fence is built from plywood. Baltic birch is great if you have it, but any flat plywood would do. (As would MDF if you’d like). The entire fence requires very little material. You can get by with a quarter sheet from a big-box store. I built this fence 22“ wide, but adjust it to fit whatever application you need. I found this size works well for a drill press or a small router table, but a larger router table would call for some simple modifications to make everything a bit wider.

1 Rip off a few strips of material from a larger sheet.
Most of the parts for this fence are straightforward. The fence base and faces are rectangular in shape. Start by ripping all the stock to width. You can see this in photo 1. When working with plywood, I never use the factory edge. While the edge of plywood may look okay, it’s usually dinged up and not straight. Running the edge over the jointer will clean up the edge and give you a true reference surface.
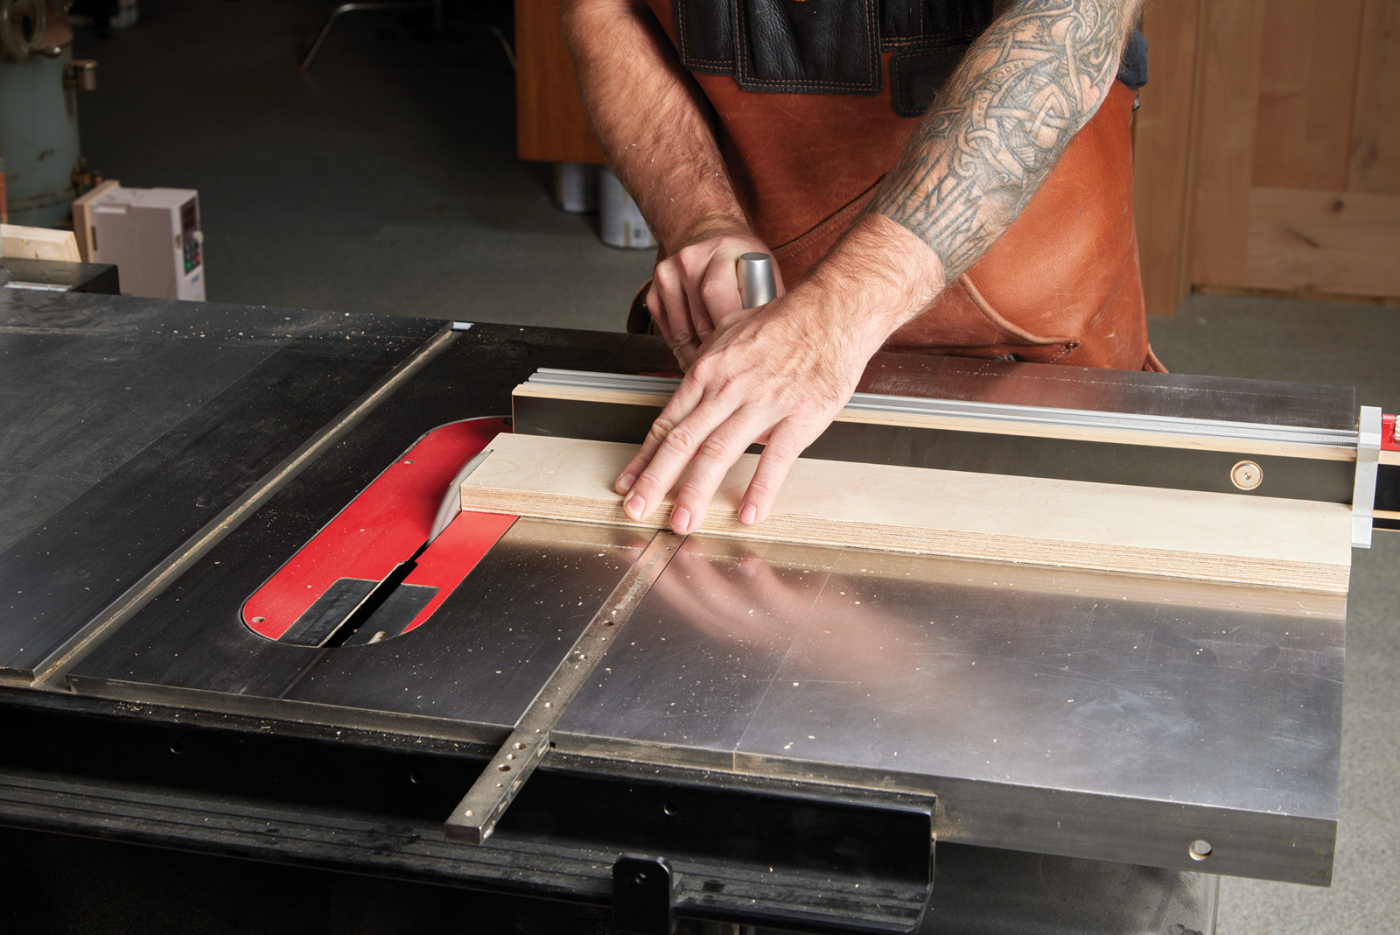
2 Using a miter gauge, square up one end of the workpieces.

3 Then flip them around and cut them to length.
After ripping off a few strips, flip over to a miter gauge to square up the ends before cutting the parts to length. Before leaving the table saw, load up a dado blade to cut a rabbet along one edge of the base.

4 A dado blade buried in an auxiliary fence helps cut a rabbet along the edge of the base.
Careful Glue Up
Before we start assembling anything, you’ll want to make a notch in the base. This helps you capture dust when using large Forstner bits, or burying a router bit if you use this on a router table. As you can see in Photo 5, I started with a large Forstner bit hole. Then, using a backsaw, I cut the waste away. If there is any nubbins or unevenness, you can file it smooth. Now, you can glue the fence faces onto the base. Apply a bead of glue to the rabbet on the base. Then, clamp the fence faces in the rabbet. The goal here is to end up with a fence that is perfectly 90° to the base. Using accurate 90° clamps help ensure this. Check out Photo 7 to see my set up. Once the fence is in clamps, you can swap over to start building the dust collection flange.

5 Bore out the notch with a Forstner bit, and cut the waste away with a hand saw. Smooth it out with files and sandpaper.

6 Glue the fence faces to the base.

7 Use right angle clamps to ensure that the fence is 90° to the base.
Dust Port
To collect dust at what ever tool you’re using this fence at, you’ll need a way to attach a flex hose. To do this, a plastic port is connected to a hardboard flange, mounted on the back side of the fence. The flange will need a hole cut in it to match the diameter of the port you purchase. I used a 2.5“ port. After cutting the flange to size, I reached a pencil in to roughly outline the opening. Because of the angle of the port, the hole in the flange is not round. However, that’s no problem. As you can see in Photos 9 and 10, a large Forstner bit will remove most of the waste. Then, a coping saw will help you saw away the rest. Smooth out the opening with a rasp and sandpaper. It doesn’t need to be perfectly smooth, but remove any lumps or bumps that could impede airflow or cause a whistling sound as the dust collector is turned on. After smoothing it out, use a block plane to bevel the top and bottom edge of the flange.

8 Transfer the port hole size and shape to the flange.

9 Drill out the waste with a large diameter Forstner bit.

10 Cut away the rest of the waste with a coping saw.
Braces
A standard L-shape is a perfectly functional way to build a fence. However, to guarantee years of accurate use, I added several braces to the back side of the fence. Looking at the drawing at the top of this article, you’ll see that there are two different braces. A pair of angled braces support the collection flange. The remainder of the braces are spaced evenly across the back of the fence. If you’re making your fence longer, you may want to add more than the 4 braces I show here.
11 Mark a radius on one corner of a brace. The radius size does not matter, nor does it matter if it’s a roundover or a cove.
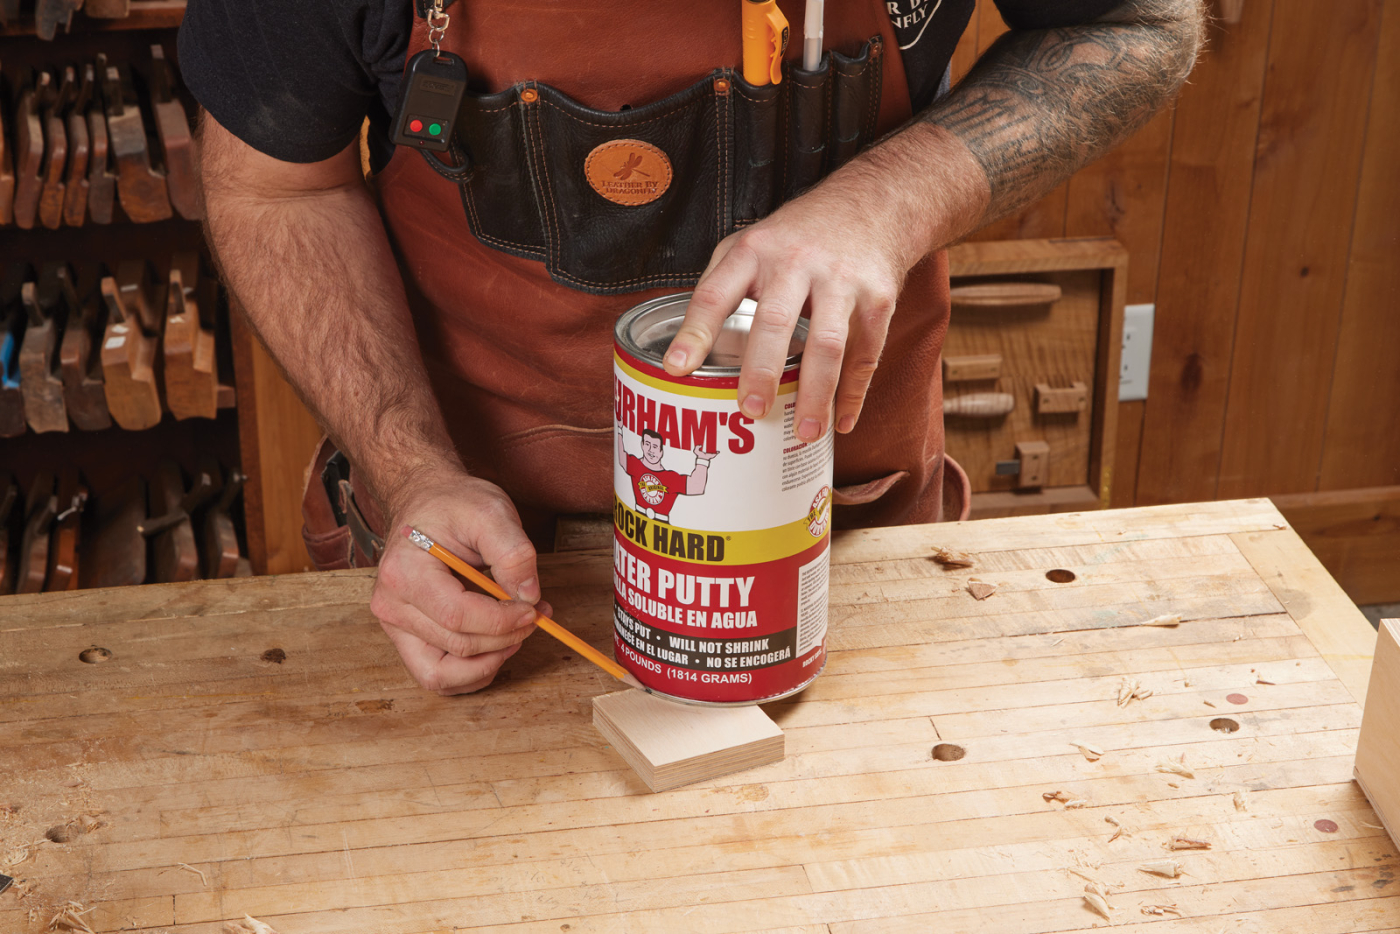
The angled braces are simply cut corner-to-corner at a 45° angle. I cut these on the band saw, and then smoothed out the cut with a block plane. The curved supports take just a bit more work. I started by tracing an arc on one of the braces. The diameter is exactly the same as a 4lb can of Durham’s Water Putty. I don’t know the radius, and it doesn’t matter. Just mark an arc.
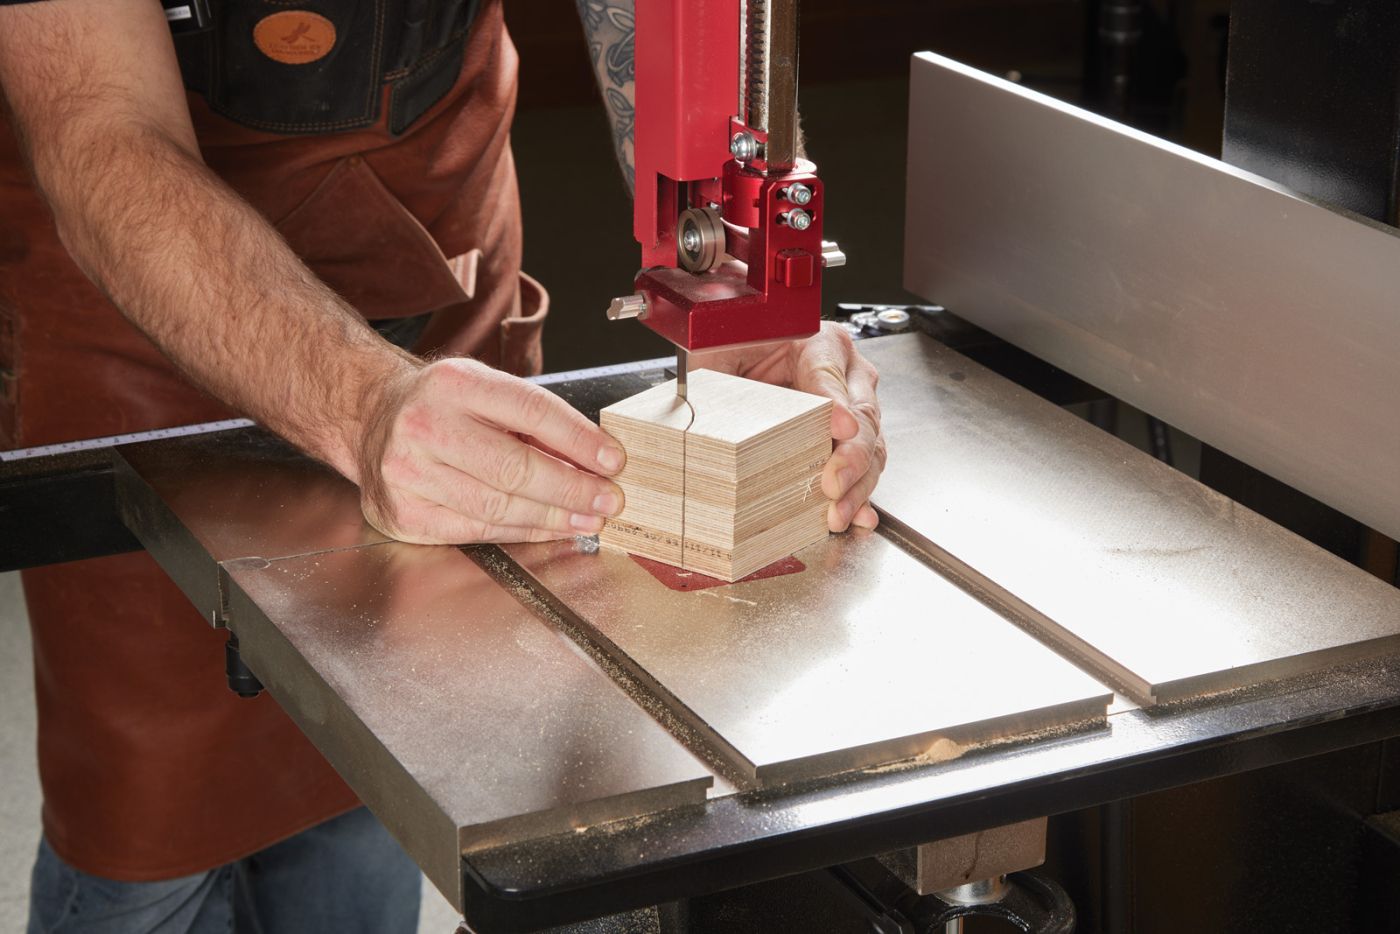
12 Cut the entire stack of braces at once. Make a smooth flowing cut to make smoothing them out easier.

13 Smoothing out the curved surface is easily done with a spindle sander, round rasps, or sand paper wrapped around a piece of PVC pipe.
With having a total of four braces, I stuck them together into a stack with double-sided tape. Then, I cut the stack at the band saw, following the line as well as I could. A quick trip to the spindle sander smoothed out the entire stack before I peeled them apart.

14 The mounting point for the dust collection flange is a pair of angled blocks.
Attaching Braces
Attaching the braces to the fence is a two-step process. First, the angled blocks need to be glued to a pair of the braces. You can see this in photo 14 above. If you want, you can shoot a few small pin nails to attach the two together while the glue dries.

15 These are glued to a pair of the braces.

16 Position these so that they are spaced correctly for the flange to fit between.
Now, all of the braces can be glued to the fence. As you see in photos 15 and 16, the braces with the attached angle blocks are glued on either side of the notch in the base. If needed, use the flange as a spacer to space these out. The other pair of braces are installed on the left and the right of the fence. Clamping them can be a bit tricky — the end braces can be clamped straight across the corner. The middle ones may need a pair of clamps—one on each end. Here again, you could shoot a few pin nails if you want. However, I’d avoid screws as you’ll be cutting a few grooves in a bit and you don’t want to nip into them.

17 Clamp the braces into place and let the glue dry. A pair of clamps on each of the middle braces, and one on the ends should do.
Long Wearing Faces
The final two things to do before putting the fence to work is to laminate the faces with laminate, as well as add a few pieces of T-track to help attach the fence to your tool of choice. Let’s get the laminate added first.
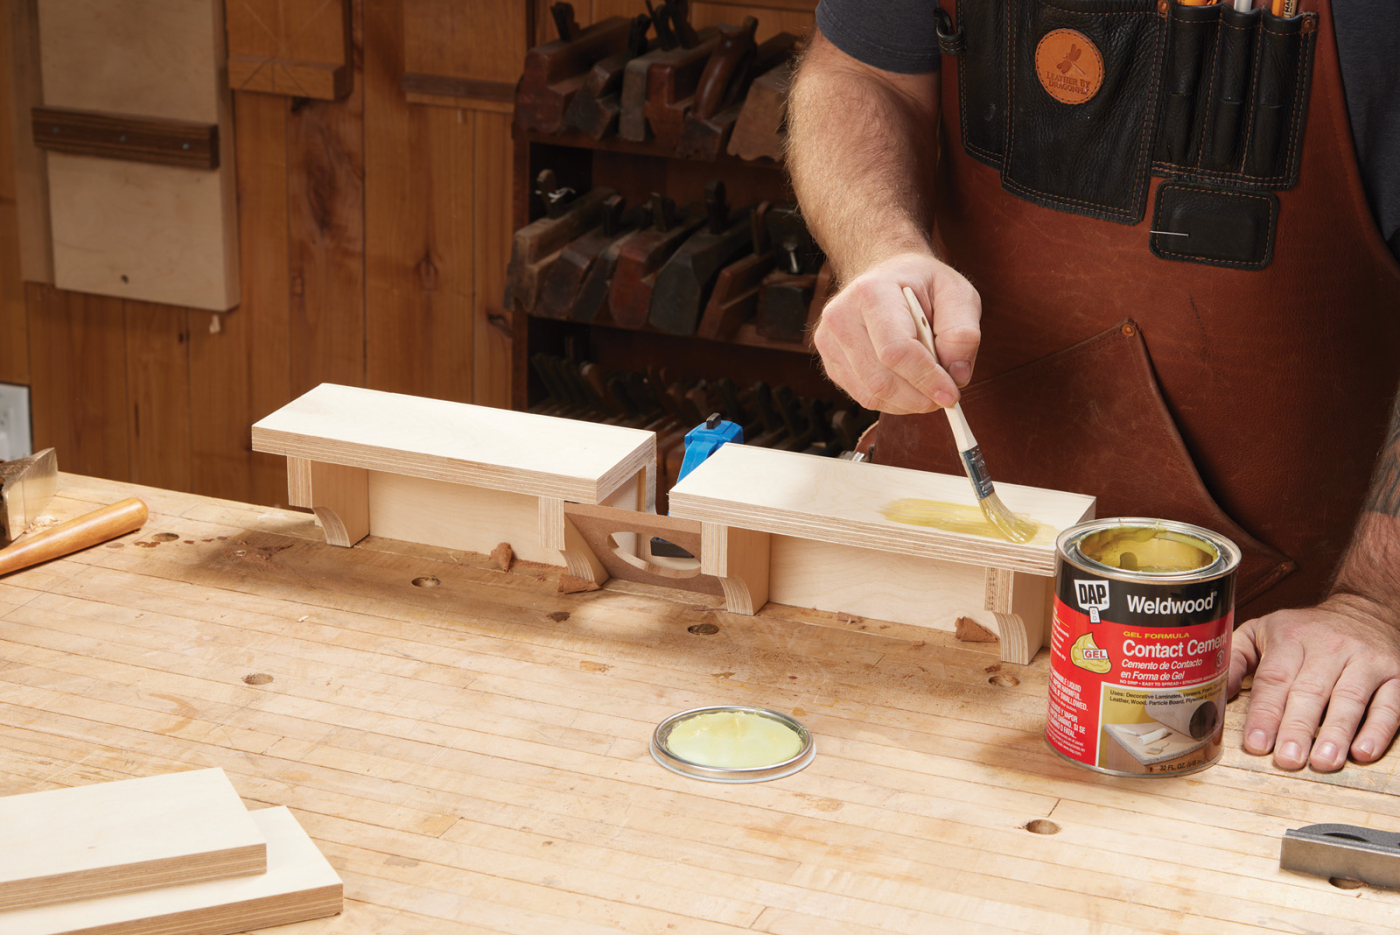
18 Brush a layer of contact cement on both surfaces that are to be bonded together.

19
If you’ve never worked with plastic laminate, it’s pretty straight forward. I prefer to install laminate with contact cement. Brush a healthy coat on both surfaces that are being mounted together. In this case, it’s a layer on each face as well as the two pieces of laminate. With contact cement, you need to let the two surfaces dry to the touch before sticking them together. Be careful positioning the laminate—once the two dried surfaces of contact cement touch each other, they bond instantly. Use your hand or a J-roller to roll them out and make the bond permanent.

20 Test the laminate to see if it’s dry. If your finger makes a squeaking sound as it’s rubbed across it, the cement is dry. Bond the two surface with firm downward pressure.
The overhanging edges of the plastic laminate can be trimmed down using a flush trim bit. (You can buy bits to trim plastic laminate, but I think for occasional trimming, a flush trim bit works just fine.) Before addressing the T-track grooves, run a chamfer bit all the way around the faces of the fence. The purpose of this is two-fold. First, it helps keep the edge of the laminate from catching during use and peeling up. Second, it provides dust relief along the base of the fence.

21 Use a flush trim bit to trim the laminate.

22 Follow up by routing a chamfer all the way around the laminated surface.
Buried T-Track
As the fence sits, it’s fully functional. A pair of clamps across the base will mount it to what ever tool you’d like. However, the addition of a couple of runs of T-track will increase the user experience ten-fold.
23 Install a dado blade the exact width of the T-track.

Make test cuts to dial in the fit before cutting a groove in the face and the base of the fence.
Installing T-track is an exercise in making test cuts and fitting. I cut a pair of grooves in the fence —one across the faces that will work for attaching stop blocks and the like. The T-track that is installed in the base is for a pair of T-track clamps. These make attaching the fence to a tool a bit more convenient. Set up a dado blade in the table saw, and cut the groove on both faces. Attach the T-track in place with screws (make sure they’re short enough so they don’t poke through). Finally, add the dust collection port and flange.

25 Use short screws to attach the T-track without poking through the plywood.

26 The final task is to attach the flange and dust collection port to the angled braces with a couple of long screws.
If you want to add a bit of storage to the fence, the area between the braces makes a great location for blocks to store drill bits, drum sanders, or router bits. A quick shot of lacquer and the fence is ready to go to work.
Here are some supplies and tools we find essential in our everyday work around the shop. We may receive a commission from sales referred by our links; however, we have carefully selected these products for their usefulness and quality.


